
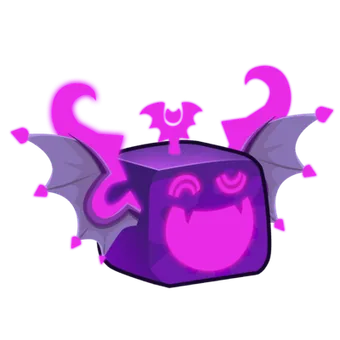
Shadow is a  Mythical fruit of
 Natural type that wields shadows and strikes with life-steal Umbra attacks. Its signature feature is the Umbra Meter - a gauge displayed permanently on-screen that fills up when you damage enemies with the fruit's abilities and rises on its own at night. It only empties in one way: by using the [V] Corvus Torment, and the higher it gets, the larger and darker the shadow aura around you becomes. This aura is purely cosmetic - it doesn't hurt anyone and makes no sound. In combat, Shadow is primarily a PvP fruit: its stun hits deal massive damage, a fully charged [V] depletes a health bar, and the [X]'s homing plus the [Z]'s i-frames open up combos. While farming, the [V]'s AoE and the [F]'s damage are sufficient, but the [Z] and [C] remain single-target and the fruit offers no
 Elemental immunity - the source advises against it in
 First Sea and early
 Second Sea, where its
 Mastery requirements are too expensive. Fun detail: the fruit looks like a bat, but all its attacks send crows, and its [Z], [X] and [C] are almost copies of
 Godhuman's in range, cooldown and energy cost.
How to get it
Shadow costs 2,900,000 Beli or 2,425 Robux from the  Blox Fruit Dealer when in stock, and it can also drop from his gacha. It's also the rarest and most expensive fruit a
 Fruit Box can give. It arrived with update 16 and its model was redesigned in update 20. For current stock, check the live block below.
Moveset
Base
| Key | Move | Preview | Description |
|---|---|---|---|
| Z | Somber Rebellion Mas. 1 |
You transform into a small shadow orb and rush towards your cursor. On contact with an opponent, you explode into a flock of crows, dealing damage to them, then you're shot upward while leaving them on the ground. If the move lands, you gain i-frames for the entire duration of the move. It's almost a twin to Godhuman's [Z] (Soaring Beast). Single-target and small hitbox - it only breaks  Instinct on the very first impact, but it remains an excellent combo starter and an escape if you trigger it at the right time. |
|
| X | Shade Nest Mas. 100 |
You send a flock of crows towards your cursor. On contact with a surface, it explodes, dealing damage and releasing small crows that rush towards a nearby enemy to damage them. These crows have slight auto-homing and multiple of them can target the same enemy. Good range, virtually no endlag and a stun, but the projectile is fairly slow with a small hitbox - it only breaks Instinct if you aim correctly. | |
| C | Nightmare Leech Mas. 200 |
You leap forward. On contact, you grab the enemy and hold them in the air - you restore 20% of your max health, deal solid damage to them, and knock them back. The move has a finishing variant - if the target has low health, at most half the move's damage, they explode instantly on contact. It breaks Instinct no matter what and kills  Pain and  Ghost users before their resurrection. However, the range is short, the endlag is long if you miss, and you have no i-frames during the animation, so you can be hit mid-move. The screen warps slightly when used. Comparable to  Sanguine Art's [Z] (Bloodbane Drain), but shorter and slower to recover from. FinisherThe [C] has a finisher variant: if the target has low HP (at most half the damage of the move), it explodes instantly on contact instead of simply being knocked back. |
|
| V | Corvus Torment Mas. 300 |
Your body swells into a giant dark sphere before exploding. It empties your entire Umbra gauge, deals a massive burst, and leaves behind an umbral cloud filled with crows that continuously damage anyone inside it. The vision of enemies hit by the explosion warps and their screen darkens, like with Awakened  Dark's [X], [C], and [V]. The size of the black hole and explosion depends directly on your Umbra gauge's fill level. The cloud remnants don't really stun - they pull enemies inward, though some teleportation moves allow escape. Short cooldown for its power and devastating for farming, but it never breaks Instinct - without a stun or holder, most players leave the radius before taking full damage. |
|
| F | Umbrage Mas. 50 |
You transform into a flock of crows and fly at medium speed for 10 seconds, then return to normal. Getting near an enemy sends crows at them to damage them, up to 50 crows if you hold the move at full power. Your hitbox becomes tiny, making it a very good dodging tool, and combining it with  Cyborg V3 (Energy Core) allows you to keep players trapped in your [V]. In exchange, the flight is slow, limited to 10 seconds, and the move isn't viable in PvP. |
 Combos 97
Combos from the official wiki (the fruit combined with swords, guns, fighting styles and races), sorted by effectiveness. The effectiveness (score out of 10) is estimated from the current PvP meta: fruit level, strength of the items used and stated damage. Remember to break the opponent's Instinct before starting, otherwise the combo won't land.
| Sequence | Difficulty | Effectiveness | Notes |
|---|---|---|---|
 Death Step V (optionnel) Shadow Z (visée bas)  Yama X Shadow V  Skull Guitar X Death Step C (maintenu) Shadow C Death Step Z Shadow X Death Step X |
Medium |  Ghoul V3 required - Cyborg V3 required |
|
Skull Guitar X Shadow Z  Fox Lamp X Fox Lamp Z Death Step V Shadow V Death Step X Death Step C (maintenu) Shadow C Death Step Z Shadow X |
Easy | One-shot ~30M - Cyborg V3 recommended - fruit stats | |
 Gravity Blade Z Shadow Z (visée bas) X Sanguine Art Z C Ghoul V3 (optionnel) Gravity Blade Z Shadow V Skull Guitar X |
Easy | Ghoul V3 recommended | |
| Death Step V (optionnel) Shadow Z Yama X Cyborg V3 (optionnel) Shadow V Death Step C (maintenu) Z X / Shadow C | Hard | ||
| Skull Guitar X Gravity Blade Z Shadow C Z Godhuman Z Gravity Blade X Shadow V X Godhuman X C | Medium | Cyborg V3 recommended |
See the 92 other combos
| Sequence | Difficulty | Effectiveness | Notes |
|---|---|---|---|
Shadow Z Cyborg V3 Godhuman X  Pole (2nd Form) X Shadow X C Godhuman Z Pole (2nd Form) Z  Venom Bow X Shadow V Z Godhuman X C Shadow X Venom Bow Z |
Hard | Cyborg V3 recommended | |
Shadow Z Cyborg V3 Yama Z  Electric Z Venom Bow X Shadow V Yama X Shadow C Electric C Z Shadow Z Yama Z Shadow X Electric X Venom Bow Z |
Hard | ||
Pole (2nd Form) Z  Kabucha X Shadow X  Flash Step Shadow Z  Dragon Talon Z Shadow C Pole (2nd Form) X Shadow V Dragon Talon X C |
Medium | ||
Skull Guitar X Shadow Z (visée bas) Shadow X Flash Step (Down) Yama X  Superhuman Z Shadow C Shadow V Yama Z Superhuman C |
Medium | ||
| (teleport near) Shadow Z (visée bas) Yama X Shadow V Death Step C, X, Z (maintenu C) Kabucha X Shadow C, X (répète) | Medium | ||
Skull Guitar X  Cursed Dual Katana Z (maintenu) Shadow Z Cursed Dual Katana X Shadow V Sanguine Art Z C X |
Easy | ||
| Death Step V Shadow Z Pole (2nd Form) Z Death Step Z C Pole (2nd Form) X Shadow V X Z Death Step X | Medium | ||
| Shadow Z, visée bas, Gravity Blade Z, Dragon Talon Z, Shadow V X, Dragon Talon X Z, Shadow F (optionnel) | Medium | ||
Shadow X Z (visée bas) Yama X Skull Guitar X Shadow V  Dark Step X C (maintenu) Shadow C |
Hard | good aim required | |
Death Step V Shadow Z Death Step Z C Shadow C  Soul Cane Z Shadow V Death Step X |
Hard | ||
| Shadow Z Fox Lamp X Dragon Talon X Fox Lamp Z Shadow V X Dragon Talon C | Hard | ||
Godhuman Z X C Shadow V (optionnel)  Shark Anchor X Z Shadow Z C X |
Easy | Cyborg V3 recommended - ken-trickable | |
| Shadow V X Dragon Talon X (vers sol) Shadow Z C Dragon Talon Z | Hard | ||
| Skull Guitar X Shadow Z Skull Guitar Z Shadow X Cursed Dual Katana X Dragon Talon X (360°) Shadow V Cursed Dual Katana Z (maintenu) Shadow C Dragon Talon Z Dragon Talon C | Hard | ||
| Gravity Blade Z Shadow X, Z (visée bas) Cursed Dual Katana X (maintenu 2s) Cursed Dual Katana Z (maintenu) Godhuman Z, X Shadow V, C Gravity Blade X Godhuman C (maintenu) | Easy | ||
| Death Step V (optionnel) Shadow Z Pole (2nd Form) Z Skull Guitar Z Shadow V Pole (2nd Form) X Death Step C Z Shadow Z Pole (2nd Form) Z Shadow X Death Step X | Medium | ||
| Shadow Z Godhuman X C Cursed Dual Katana X Shadow V X Skull Guitar X (optionnel) Cursed Dual Katana Z (maintenu) Godhuman Z Shadow C Skull Guitar Z Shadow Z | Medium | ||
 Electric Claw C Z (up) Shadow Z Skull Guitar Z Shadow X Cursed Dual Katana X Shadow V Cursed Dual Katana Z (maintenu) Shadow X Electric Claw X |
Medium | ||
Godhuman C (maintenu)  Spikey Trident X Godhuman Z X Shadow Z Skull Guitar Z (visée bas) Flash Step (vers l'ennemi) Shadow V X C Spikey Trident Z |
Medium | ||
| Shadow Z Skull Guitar Z Flash Step Shadow X Cyborg V3 (optionnel) Shadow V Pole (2nd Form) Z X Godhuman Z C X Shadow C X | Medium | ||
| Gravity Blade Z Shadow C Z (visée bas) Skull Guitar Z X Shadow V Dragon Talon X Z Gravity Blade X (flash step) Dragon Talon C | Easy | fruit stats | |
| Godhuman C (maintenu) Shadow Z (visée bas) Cursed Dual Katana X, Z Shadow C, X Godhuman X Kabucha X Shadow V, F (maintenu F) | Medium | ||
| Shadow Z (visée bas) Dragon Talon X Kabucha X Soul Cane Z, X (maintenu X) Dragon Talon Z Shadow V, X, C Dragon Talon C | Easy | ||
| Electric Claw C Z (visée haut) Kabucha X (visée bas) Shadow Z Yama X Shadow V X C Electric Claw X Kabucha Z Yama Z | Medium | ||
| Shadow Z Cyborg V3 Yama X Shadow V Superhuman Z (visée haut) Shadow C X Superhuman C Flash Step Superhuman X | Medium | ||
| Godhuman C Cursed Dual Katana X Shadow Z Cursed Dual Katana Z (quick) Shadow V X Godhuman Z Shadow C Godhuman X | Hard | ||
(teleport near) Shadow Z (visée bas)  Midnight Blade Z, X Skull Guitar X Sanguine Art C Shadow V, X Sanguine Art Z |
Medium | ||
Pole (2nd Form) Z X  Acidum Rifle Z Shadow X Z Superhuman C Z Shadow C / Flash Step Pole (2nd Form) Z Shadow V |
Hard | ||
| Godhuman C Cursed Dual Katana X Shadow V Z X Godhuman X Cursed Dual Katana Z (maintenu) Shadow C Godhuman Z | Easy | ||
Shadow Z Kabucha X  Hallow Scythe Z Shadow V C Sanguine Art Z C Shadow X Hallow Scythe X Sanguine Art X |
Medium | ||
Kabucha X Shadow Z (visée bas)  Saishi Z Shadow V, C Sanguine Art C, Z Shadow X Sanguine Art X Saishi X |
Medium | ||
| Godhuman C (maintenu) Spikey Trident X Venom Bow X Shadow V Godhuman X Shadow Z X Godhuman Z Shadow C | Medium | ||
| Shadow Z Yama X Shadow V Acidum Rifle Z X M1 Death Step C (maintenu) Acidum Rifle M1 Death Step X Z | Medium | ||
| Shadow Z Kabucha X (down) Shadow V X Godhuman C Cursed Dual Katana X Shadow C Godhuman X | Hard | ||
Shadow Z (centre)  Dragon Trident X Dragon Talon X Z Skull Guitar X Shadow V Dragon Talon C |
Hard | ||
Sanguine Art C Z Shadow V Z (visée bas) Kabucha X  Dark Blade X Z Shadow X C Sanguine Art X |
Easy | ||
| Shadow Z Dragon Talon X Cursed Dual Katana X Shadow V Cursed Dual Katana Z Dragon Talon Z | Medium | ||
Shadow Z Yama X (Down) Shadow V C Sanguine Z C  Dragonstorm/Kabucha X (Flash step) Shadow X Sanguine X |
Easy | ||
| Shadow Z Yama X (visée bas) Shadow V Death Step C Z Shadow C Death Step X Shadow X | Medium | ||
Shadow V Z (visée bas)  Saber X Z Shadow C Serpent Bow X Z Sanguine Art C Z Shadow X F |
Medium | ||
| Godhuman C Spikey Trident X Shadow Z Godhuman X Kabucha X Shadow V X C Godhuman Z | Hard | ||
| Skull Guitar X (optionnel) Shadow Z Dragon Talon X Z Yama X Shadow V Dragon Talon C | Medium | ||
| Shadow Z Yama X Shadow V Electric C Shadow X C Kabucha X Yama Z Electric X | Medium | ||
| Kabucha X Shadow X Dragon Talon X Shadow C Dragon Talon Z Flash Step Shadow Z | Hard | ||
| Kabucha X Shadow Z (visée bas) Yama X Shadow V Sanguine Art Z, C, X Shadow C, X | Easy | ||
| Shadow Z (visée bas) Cursed Dual Katana X, Z Shadow V Godhuman Z, X, C Shadow C, X | Medium | ||
| Shadow Z Sanguine Art X C Spikey Trident X Venom Bow X Shadow V Sanguine Art Z | Hard | good aim required | |
| Death Step Z Shadow C Yama X Death Step C Shadow Z Death Step Z X Shadow X | Easy | ||
| Shadow Z Dragon Talon X Z Shadow C Spikey Trident X Shadow V Dragon Talon C | Medium | ||
 Sharkman Karate X Z Shadow Z Yama X Shadow V X C Sharkman Karate C Yama Z |
Medium | ||
| Shadow Z Yama X Shadow V Death Step C (maintenu) Z Shadow C Death Step X | Medium | ||
| Shadow Z Yama X (down) Shadow V Electric Claw C Shadow X ou Electric Claw Z | Medium | ||
| Shadow Z Yama X Shadow V Sanguine Art Z C Yama Z Shadow X Sanguine Art X | Medium | ||
| Sanguine Art C Yama X Shadow V Z Sanguine Art Z Shadow X Sanguine Art X | Medium | ||
| Shadow X Kabucha X Pole (2nd Form) Z X Flash Step Shadow V Godhuman Z C | Medium | ||
| Shadow Z Dragon Talon X Z Shadow C Yama X Shadow X V Dragon Talon C | Easy | ||
| Shark Anchor X Shadow Z Dragon Talon X Z Shark Anchor Z Dragon Talon C | Medium | ||
| Spikey Trident X Shadow Z (visée bas) Godhuman X Godhuman Z Shadow V | Medium | ||
| Shadow Z Dragon Talon X Z Spikey Trident X Shadow V X Dragon Talon C | Medium | ||
| Skull Guitar X Shadow Z X Soul Cane Z Sharkman Karate X Z Shadow C V | Hard | ||
| Shadow [Z{ou C}], X Flash step (optionnel) ->) Z, X, C, ((Buddy sword)) Z, X | Medium | ||
| Shadow Z Yama X Shadow X Dragon Talon X Shadow V Dragon Talon C | Hard | ||
| Godhuman C (maintenu) Cursed Dual Katana X Shadow V X Z Godhuman X Z | Hard | ||
| Skull Guitar X Shadow Z Godhuman Z C Spikey Trident X Shadow V X | Easy | ||
| Shadow Z Dragon Trident X Kabucha X Shadow X V Godhuman X Z C | Medium | ||
| Shadow Z Godhuman X C Spikey Trident X Godhuman Z Shadow C X | Hard | ||
| Electric Claw C (visée haut) Z Yama X (visée bas) Shadow V Z X | Medium | ||
Shadow Z (visée bas)  Dark Dagger X Z Shadow C Godhuman Z C |
Hard | ken-trickable | |
| Dragon Talon Z Spikey Trident X Shadow V X Dragon Talon X | Easy | ||
| Shadow Z Godhuman C Shadow X Spikey Trident X Shadow C | Easy | ||
| Electric Claw C Z Yama X Shadow V C Z X Electric Claw X | Medium | ||
| Shadow Z Yama X Shadow V Superhuman Z C Shadow X | Easy | ||
| Shadow Z Yama X Shadow V Godhuman Z C Shadow C X | Easy | ||
| Skull Guitar X Shadow V Sanguine Art C Z | Easy | ||
Shadow Z Kabucha X Flash Step Shadow V Pole (2nd Form) X  Water Kung Fu X Pole (2nd Form) Z Shadow X, C Water Kung Fu C Z |
Medium | ||
| Shadow Z Dragon Talon X Shadow X Gravity Blade X Dragon Talon Z Shadow C Gravity Blade Z Shadow V Dragon Talon C | Hard | ||
| (teleport near) Shadow V X C Gravity Blade Z Godhuman X Z Shadow Z (visée bas) Godhuman C (maintenu) | Easy | ||
| Shadow Z Electric Claw C Z Midnight Blade X Shadow V X C Electric Claw X Shadow F | Medium | ||
| Shadow Z Fox Lamp X (down) Dragon Talon X Fox Lamp Z Shadow V X Dragon Talon C | Medium | ||
| Shadow Z Sanguine Art Z Shadow V C Sanguine Art X Shadow X Sanguine Art C | Easy | ken-trickable | |
| Shadow X C Z V (optionnel) Sharkman Karate X (visée bas) Z Shadow F (optionnel) | Easy | ||
| Death Step V (optionnel) Shadow Z Death Step Z C Shadow C (visée bas) X | Easy | ||
| Shadow V Z (visée bas) X Superhuman Z Shadow C Superhuman C Shadow Z | Medium | ||
| Shadow Z Fox Lamp X Z Shadow X V Dragon Talon X (down) C | Hard | good ping | |
| Shadow Z Dragon Talon X Z Dragon Trident X Shadow V X C | Medium | ||
| Shadow V Z (visée bas) X Flash Step (Down) Shadow C ( F) | Easy | ||
| Gravity Blade Z Godhuman Z Shadow Z Godhuman C (tapé) | Medium | ||
| Sanguine Art Z C Shadow V Z C X Sanguine Art X | Medium | good aim required | |
| Shadow Z Superhuman Z Shadow C Superhuman C | Easy | ||
| Shadow Z C X Buddy sword Z X | Medium | ||
Death Step V (optionnel) Shadow Z  Rengoku Z (visée bas) Shadow X Death Step X if Close et au sol) |
Hard | good aim required | |
| Gravity Blade Z will bring enemy Closer while breaking instinct, meaning Shadow V Can no longer be instinct tricked. Helps if Umbra meter is Filled, will do much more damage et Shadow V will have larger AoE. | Easy |
Strengths and weaknesses
- Massive damage on all moves and huge combo potential
- Good mobility and solid speed, with a [Z] that can get you out of a combo if you trigger it at the right time
- [Z] - i-frames for the entire duration of the move, enough to pass through attacks like Gravity Blade's [Z] or
 Portal's
- [X] - good range, auto-homing crows that rush towards the target, virtually no endlag, and it stuns
- [C] - restores 20% of your max health, breaks Instinct no matter what, and kills Pain and Ghost users before their resurrection
- [V] - massive damage, huge hitbox and AoE with full Umbra gauge, short cooldown for its power, and excellent for farming since enemies can't escape the explosion
- [F] - very good for farming, reduces your hitbox to almost nothing to dodge, and pairs very well with Cyborg V3 (Energy Core) to keep players trapped in your [V]
- The moves drain a lot of the opponent's Instinct when dodged
- Pairs perfectly with Yama and Dragon Talon, and very well with the
 Cyborg race
- More accessible than most other Mythical fruits
- High Mastery requirements - 300 for [V], 200 for [C]
- All moves require at least a stun to land in PvP
- Annoying passive during the day, since the Umbra gauge only fills up on its own at night
- Poor on certain
 Sea Events
- [Z] - single-target, small hitbox, and it sends you into the air, which sometimes makes it hard to launch or extend a combo
- [X] - fairly slow projectile, small hitbox, and it only breaks Instinct with precise aim
- [C] - single-target, short range, long endlag if you miss, and no i-frames during the animation
- [V] - never breaks Instinct, reduced AoE if the Umbra gauge isn't full, and most players escape the radius without a stun or holder
- [F] - 10 seconds maximum, slow flight, not viable in PvP
- No Elemental immunity - not recommended in First Sea and early Second Sea
- Low trading value for a Mythical, sometimes lower than certain Legendaries, due to lack of demand and not due to lack of power
Our verdict
Shadow checks almost all the boxes in a duel - massive burst, life-steal, i-frames to get in and enough to finish once your opponent runs out of Instinct dodges. The price to pay is Mastery (300 for [V]) and a real precision requirement, since without a stun your moves miss. Keep your Umbra gauge full for maximum [V] power, pair it with Yama or Dragon Talon, and avoid using it before the end of Second Sea. Worth noting: the source announces a rework coming in a future update.
Live value and stock
 Update history
Fruit : Shadow·Released : Update 16
 Mammoth
 Meme
 Meme
 Phoenix
 Quake
 Revive
 Rocket
 Rubber
 Sand
 Shadow
 Smoke
 Soul
 Sound
 Spider
 Spike
 Spin
 Spirit
 Spring
 T-Rex
 Tiger
 Venom
 Yeti